4 Simple Techniques For Vitamin C Serum
9. Early morning or even Evening Because we`ve covered a whole lot of the Hows and Whys, it seems to be to become opportunity for a When. diy vitamin c serum. There are regularly questions about when in the day to apply the several appeal items as well as in what order. Effectively, as our company pointed out over in # 1, you must initially wash your face and also use toner, if that`s part of your regimen.

You may utilize your product any time, but if you use your vitamin c items in the night, you can rest effortless understanding that your serum is actually working its magic while you fantasize. diy vitamin c serum. Whether you utilize it in the morning, during the night, or both, your skin mentions thanks for the affection. best vitamin c serum for face.
One idea is actually a do-it-yourself face-massage! Negative effects may feature a sense of general relaxation, reduction of migraine, as well as feeling that you ought to possess been doing this each day of your life – vitamin c serum. Massage may enhance blood circulation and also stimulate the cells that aid make certain combinative tissues like elastin and also bovine collagen, and also as you perhaps currently know, each of those assistance in always keeping the skin firm. vitamin c serum benefits.
Right here`s an example of one that concentrates on the face series as well as jowls that region that comes to be more of a concern as our experts grow older. vitamin c serum benefits. And also not that you need the suggestion, however you`ll wish to ensure your hands are actually clean just before you go wiping them across your skin.
Not known Details About Vitamin C Serum Benefits
We are actually the leading appeal company for water-based skin care products and promote the significance of great skin layer moisture. Follow us on,, as well as.

Start your make-up. Look at my everyday makeup routine and items here. What`s great concerning Vitamin C products is actually that they may be administered as a foundation layer under whatever items you utilize in the early morning, due to the fact that the really good ones certainly never feel awkward. This listing of the most ideal vitamin C lotions features all the “good ones”! Exactly how Often Should You Be Actually Using It? For optimal results, you must make use of Vitamin C cream every solitary day.
According to skin doctors, Vitamin C is among: Quickly after utilizing a product with Vitamin C like a cream you`ll notice enhanced joy as well as gloss Along with consistent usage gradually, it aids create collagen and increases suppleness, After just 4-6 weeks, dermatologists claim you can expect to see an and Listed below is actually how one dermatologist DOCTOR
Consider it as `Pac-Man` consuming those little pellets, Products including Vitamin C additionally PIN THIS ARTICLE FOR LATER: – best vitamin c serum. Delta 8 Vape Pen
All about Diy Vitamin C Serum
While some skin care components are shrouded in obscurity, others are actually so much more familiarone of the last being vitamin C diy vitamin c serum. It`s therefore universal in lightening products and treatments that whether you`re just meddling healthy skin care or even you`re the friend everyone content for guidance, we want to bet you have actually come across the highly effective antioxidant.
And also last but not least, do not it use with retinol, which may produce the vitamin C a lot more uncertain and also much less likely to infiltrate the skin layer – vitamin c face serum. What is Vitamin C? Depending on to Robinson, vitamin C is a vital nutrient required for the growth and also fixing of cells in all component of the body system, consisting of the skin, however our team may not generate it on our own – vitamin c serum.
The first kind of vitamin C worth mentioning is actually the pure type, L-ascorbic acid. Herrmann says this is actually the most biologically energetic and well-studied kind of vitamin C, yet there are likewise numerous vitamin C derivatives, like salt ascorbyl phosphate, ascorbyl palmitate, retinyl ascorbate, tetrahexyldecyl ascorbate, as well as magnesium mineral ascorbyl phosphate.
“So when these by-products are available in contact with the skin layer, they release the pure vitamin C onto the skin.” For example, he states if an item includes 10 percent of one of these derivatives, they may simply launch 3 percent of pure vitamin C on the skin vitamin c serum. Herrmann incorporates that the variants mainly differ in their hydrophilicity their potential to simply dissolve in water and also p, H.
How Vitamin C Serum For Face can Save You Time, Stress, and Money.
She covered one end of a piece along with a thin level of vitamin C cream and left the opposite totally untouched. After that, she awaited 3 hours – vitamin c serum before and after. Right here`s what occurred: Rene Rouleau As you can easily observe, the side of the apple that was coated with the vitamin C cream failed to corrode in all.
Nonetheless, in high focus, it can be upsetting, particularly if blended with various other acids. Herrmann points out those with exceptionally delicate skin may not have the capacity to endure it, and in which instance, must avoid it – best vitamin c serum for face. Many vitamin C items are also oily, which may be bothersome for those along with oily skin layer, therefore Herrmann recommends consulting your board-certified skin specialist to discover a label or item that is actually ideal fit for your skin layer type – best vitamin c serum.
While some argue that morning is actually well for guarding the skin layer, others favor evening time when the skin`s vitamin C is actually very most exhausted. Depending on to Herrmann, consistency is crucial, whether you make a decision to administer it in the morning or just before bedroom, yet stay clear of utilizing it at the very same opportunity as benzoyl peroxide.
Various other Types As wonderful as it is, vitamin C isn`t without hurdles. First off, it is actually inherently unstable and sensitive and also effortlessly sheds its antioxidant residential or commercial properties when left open to warm, light, and air – vitamin c serum for face. As a remedy, aesthetic companies have actually been getting on the powder kind of vitamin C to help boost reliability, which would, theoretically, make it final longer and also boost the rack lifestyle.
The Ultimate Guide To Best Vitamin C Serum For Face
To be helpful, Herrmann points out vitamin C have to remain in an attention of at the very least 10%, and the p, H of whatever you are actually adding it to must be actually acid to allow for its absorption. “It`s challenging to know the p, H of products, and even though you get it straight, the powder can take shape on the skin before it has a possibility to absorb, which is a must-do for efficiency.” Consequently, Herrmann discourages the DO-IT-YOURSELF trend – vitamin c serum benefits.
When in your regimen should vitamin C lotions be made use of? Right now we have actually established that vitamin C is better utilized each day as aspect of your morning schedule, it is actually a concern of at what point it need to be actually made use of – vitamin c serum before and after. The standard policy of healthy skin care is that products need to be used so as of viscosity that suggests one of the most water-like products need to be used initially, steadily developing to the thickest texture.
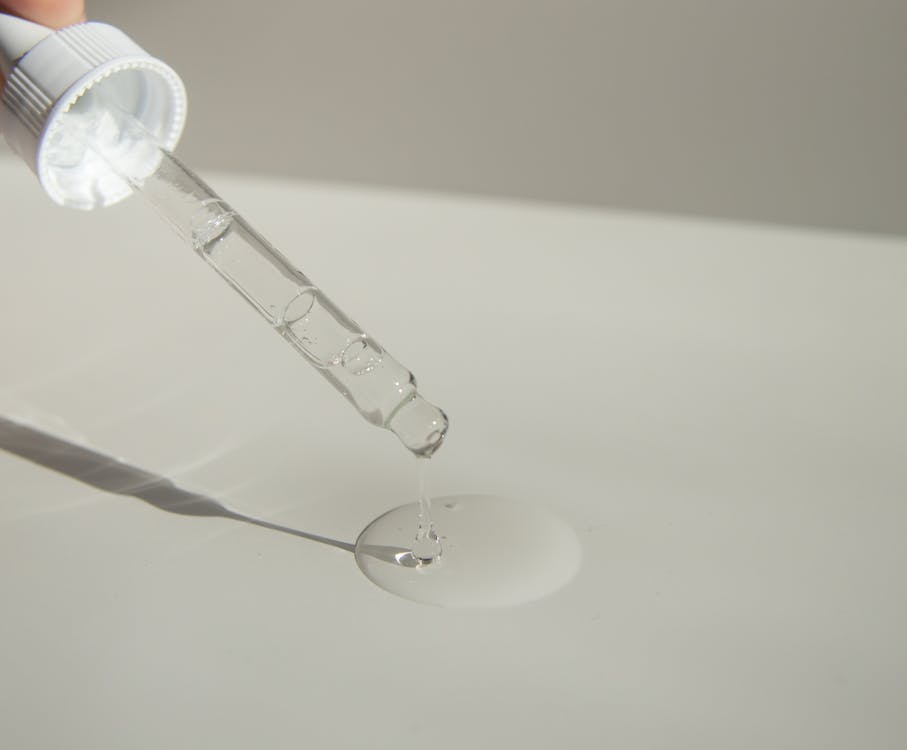
How to administer vitamin C product, It deserves keeping in mind that some vitamin C serums may be quite potent. That pointed out, it is generally effectively endured in many skin types but our team would point out that it is actually consistently most ideal to be incorrect on the edge of vigilance and also do a little patch examination just before use, specifically if you are actually making use of a brand new product for the very first time.
After that, since vitamin C serums have a tendency to be pretty watered-down in texture, it is actually simpler to pat your hands with each other and after that delicately pat the product in to your skin layer instead of rubbing it in like a cream. It is actually always worth waiting a number of moments therefore prior to moving onto your following measure, by doing this the cream has sufficient opportunity to take in in to skin effectively.